 LittleLearners
✏️ Writing & Fine Motor Skills
Scissor Skills Progression (Ages 3–5)
The short answer
Scissor skills build in stages: snipping playdough and paper strips first, then straight lines, zigzags, curves and finally shapes. Start around age 3 with child-safe scissors and close supervision, keep sessions short, and expect wobbly lines for a long time — that's the normal learning curve, not a problem.
Why cutting matters (it's not just craft)
Cutting is one of the finest fine-motor workouts available. It demands bilateral coordination — the two hands doing different jobs at once, one cutting, one turning the paper — plus hand strength, hand-eye coordination and sustained concentration.
That's why the EYFS treats it as a core physical-development skill, not just an art activity. The control children build with scissors transfers directly to pencil control: the same small muscles, the same two-hands-working-together.
Safety first: the non-negotiables
Before any cutting happens, set the rules once and enforce them calmly every time:
- Child-safe scissors only: blunt tips, small loops, sized for little hands
- Sitting down at a table — no walking, running or waving with scissors, ever
- An adult in the room and watching, especially under 4
- Scissors stay on the table when not cutting; they get handed handle-first
- Cut away from fingers and bodies — paper held at the edges, not near the line
Stage 1: snipping (around age 3)
Forget lines entirely. The first skill is simply opening and closing the scissors — and the best material isn't paper, it's playdough. Rolling playdough into snakes and snipping them into pieces gives satisfying resistance that builds hand strength, with zero frustration about accuracy.
Paper strips come next: narrow strips of card that your child snips into confetti. Short, single snips. No lines to follow, no wrong answers — just snip, snip, snip. This stage can happily last weeks.
Watch their hands during snipping: the helping hand should hold the strip steady while the cutting hand does the work. If both hands try to do everything, gently hold the strip with them once or twice — then let go. They'll get it.
Stage 2: straight lines
When snipping is confident, introduce lines — thick ones first. A line 1–2 cm wide is far more forgiving than a hairline, and success matters more than precision at this stage.
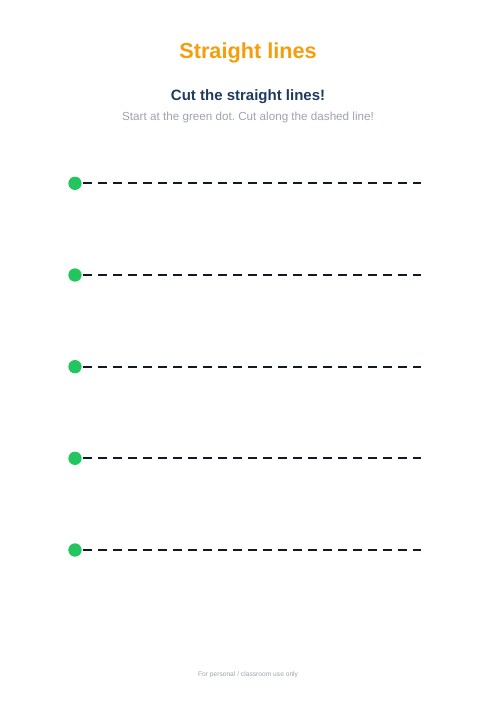
Teach the rhythm: 'open, push forward, close' — small bites along the line rather than long dramatic cuts. Put a green dot where each line starts ('start here') so they learn to begin at the beginning rather than attacking from the middle.
Thumbs up is the mantra: the thumb goes in the small loop and points to the ceiling. If the thumb droops sideways, the cutting weakens — one gentle reminder per session is plenty.
Length matters too: start with short lines (5–8 cm) so success comes quickly, then gradually lengthen. A child who cuts three short lines happily will attempt a long one; a child faced with a 20 cm line first often gives up halfway. Build the wins small, then stretch them.
Stage 3: zigzags, waves and curves
Here's the secret professionals know: for curves, the cutting hand stays fairly still and the other hand turns the paper. Demonstrate this explicitly — most children try to steer the scissors round the bend, which is much harder.
Order of difficulty: gentle waves, then zigzags (stop-start at each point), then full curves, then spirals. Each one is a genuine step up. Expect this stage to span months, not days.
Zigzags deserve a special mention because they teach something new: stopping. Each point of the zigzag needs the scissors to stop, the paper to turn slightly, and cutting to restart. That's impulse control as much as motor skill — and it's why zigzag-cutting children often show better pencil control too. Celebrate the corners, not just the lines.
Stage 4: shapes
Cutting out shapes combines everything: straight lines, corners (stop, turn the paper, restart) and curves. Start with squares — four straight cuts with pauses at the corners — before attempting circles, which need continuous smooth turning and are genuinely hard.
A satisfying project: cut simple shapes and glue them into pictures — a house from a square and triangle, a flower from circles. The cutting has a purpose, and the fridge gets new art.
Left-handed cutters
This matters more than most parents realise. Standard scissors are right-handed: the blades are arranged so a right-hander's grip pushes them together. A left-handed child using right-handed scissors gets blades that push apart — cutting becomes mysteriously difficult and the child looks 'bad at cutting' when the tool is the problem.
Left-handed child-safe scissors exist, they're inexpensive, and they make an enormous difference. Also seat left-handed cutters on the left at shared tables so elbows don't collide, and mirror your demonstrations rather than expecting them to flip your right-handed demo mentally.
Keeping it fun for months
Scissor skills develop over a year or more, so variety is everything: fringe a paper plate to make a lion's mane, cut straws into beads for threading, snip herbs (with supervision) for play cooking, make paper chains, cut out catalogue pictures for collages.
Short sessions, genuine praise for effort ('look how far along the line you got!'), and zero red-pen energy about wobbles. The lines straighten on their own schedule.
And keep the end products: a folder of 'look what I cut' builds pride over months in a way nothing else does. Date a few pieces — future you will love seeing the wobbly January lines next to the confident June shapes.
If you'd like the progression ready to print — snipping strips, thick-to-thin lines, zigzags, waves, curves and shapes in order — our scissor skills pack lays out the whole journey in nine pages, each with 'start here' dots to guide little hands.
Practise this at home
Scissor Skills: Cut Along the Lines
9-page printable pack · £3.99 · Buy once. Yours forever. No subscription, no renewals.
Get the packParents also read
Pre-Writing Skills Before Letters
Before letter tracing: the pre-writing strokes — lines, curves, zigzags and shapes — that build the hand control children need for writing.
Pencil Grip Guide for Parents: Ages 3–6
The tripod grip explained for parents: how pencil grip develops, what to model, practical exercises — and what not to correct too early.
Line Tracing: The Full Progression
The line tracing progression, level by level: finger tracing to thin lines, mazes and shapes — when to move up, and how to know your child is ready.
Questions parents ask
What age can children start using scissors?
Around 3 for supervised snipping with child-safe scissors, though readiness varies — interest and the ability to follow the safety rules matter more than the birthday. Line-cutting typically follows at 3½–4.
Do I need special scissors?
Child-safe scissors with blunt tips and small loops, yes. For left-handed children, left-handed scissors specifically — standard scissors genuinely don't work properly in the left hand. Beyond that, no special features needed.
My child can't cut on the line — help?
Make the lines thicker, the sessions shorter, and check the technique: thumb up, small bites, other hand turning the paper on curves. Most 'can't' is really 'the task is currently too hard' — drop back a stage and rebuild.
How do I teach them to hold scissors properly?
Thumb in the small loop pointing up, fingers in the big loop, other hand holding the paper at the edges. Show them once hand-over-hand if needed, then let them practise — one reminder per session, not per cut.
Is cutting playdough as good as cutting paper?
For stage 1, it's better — the resistance builds the hand strength paper can't. Move to paper strips once the open-close action is confident. Both have their place in the progression.
How long until neat cutting?
Months, honestly — often a year from first snips to tidy shapes. Reception expects willing participation and developing control, not precision. Wobbly lines at 4 are the curriculum working, not a concern.