 LittleLearners
✏️ Writing & Fine Motor Skills
Line Tracing: The Full Progression
The short answer
Line tracing progresses in four levels: finger tracing big shapes, thick dashed lines with chunky crayons, thinner lines with zigzags and curves, then mazes and closed shapes. Move up when the current level looks easy and relaxed — not perfect. Short, happy sessions build the pencil control that makes letter formation dramatically easier later. Give each level weeks, not days.
What line tracing actually builds
Line tracing looks simple — follow the dashes — but it trains four things at once: hand-eye coordination (the hand goes where the eye looks), pencil control (staying on a path), directionality (left to right, top to bottom, the habits reading and writing need), and pressure control (not pressing through the paper or floating above it).
That's why it's the bridge between scribbling and letter formation. Letters are just small, precise traced paths — and a child who can trace a wavy line smoothly already owns half the skill.
One honest note: tracing is practice, not art. Don't worry if they show zero interest in 'staying in the lines' of a colouring page — that's a different skill, and a much less important one. This guide is about following paths, not colouring neatly.
Level 1: finger tracing — no pencil yet
Start with the finger, not the pencil. A finger can't be gripped wrong, pressed too hard or snapped in frustration — it removes every barrier except the one you're actually teaching: following a path.
Draw big shapes in sand, shaving foam, or with chalk on the pavement: circles, waves, zigzags as tall as their arm. Trace raised lines — glue dried on card, or a finger along a rope glued in a wavy line. Big movements train the shoulder and elbow, which is where pencil control actually starts.
Stay here until big paths feel easy and fun — usually a week or two of occasional play. There's no rush; everything that follows is easier for a child whose arm knows the way. If they invent their own paths — a wavy road for a toy car, a circle round a sticker — celebrate it; self-chosen tracing is the best kind.
Level 2: thick lines and simple paths
Now introduce the chunky crayon or marker — the fatter the better, because it forgives the grip. Offer wide, bold dashed lines: straight lines first, then gentle curves and big waves.
Green start dots matter enormously: a dot where the line begins teaches direction without a single word of instruction. Left-to-right, top-to-bottom habits form here, silently.
Keep the paths short — three or four inches. A short line completed beats a long line abandoned. And sit beside them doing your own page: tracing is contagious, lecturing isn't.
Level 3: thinner lines, trickier paths
When thick straight lines look relaxed — smooth, unhurried, roughly on the dashes — narrow the lines and complicate the paths: zigzags with sharp corners, loops, spirals, and lines that change direction.
Corners are the milestone: stopping precisely at a corner and turning is much harder than flowing through a curve. Celebrate corners specifically — 'you turned right at the corner!' — because that's the skill letters like 'k' and 'z' will demand.
If frustration appears, drop back a level without comment. Going back isn't failing; it's how the level gets consolidated. Most children bounce between levels 2 and 3 for weeks, and that's exactly right.
Level 4: shapes, mazes and staying the course
The final level adds planning: closed shapes (trace the whole way round and finish where you started), simple mazes (choose the path, then follow it), and longer winding paths.
Mazes are the graduation exercise — they combine everything: direction, corners, sustained control, and thinking ahead. Start with very easy ones (one or two dead ends) and let them trace the solution with a finger first.
You'll notice colouring-inside-the-lines improving as a side effect now. It was never the goal, but the control transfers — a nice bonus, not something to demand.
When to move up (and when to step back)
Move up when the current level looks easy: smooth, fairly quick, and — most importantly — relaxed. A relaxed hand is a learning hand; a tense, white-knuckled hand is a hand that's surviving, not learning.
Step back when you see avoidance (suddenly 'thirsty' every tracing session), tears, or a grip that collapses into a fist. All three mean the challenge outran the skill. Drop a level for a week; confidence returns fast.
And the golden rule across all levels: stop while it's fun. One page done happily teaches more than three pages done miserably. The progression works on months, not days.
From lines to letters: the handover
You'll know they're ready for letters when level 4 feels easy: smooth mazes, confident corners, relaxed grip. At that point, letter formation is just tracing with meaning — and the strokes themselves (the curves, lines and circles letters are built from) are covered in our pre-writing skills guide.
Start with the letters in their name — motivation beats alphabetical order every time. Big letters first, on the same kind of dashed lines they've already mastered; only the shape is new, not the skill.
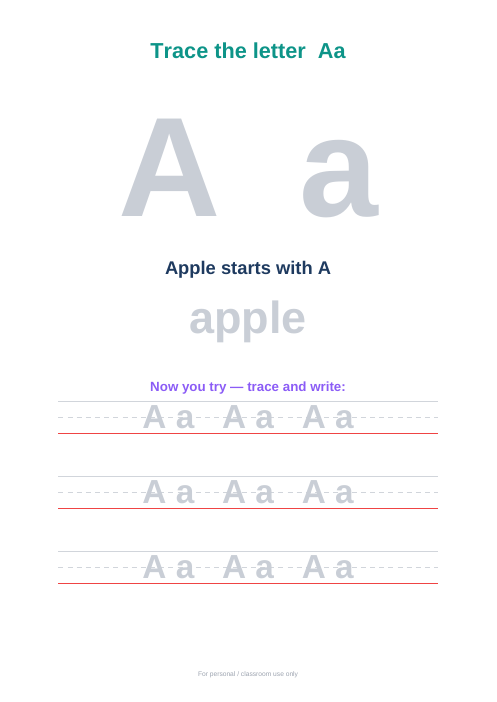
If you'd like the next step as print-and-go pages — every letter A–Z as a giant traceable letter on proper UK handwriting lines, with a starter word for each — our Alphabet Tracing pack picks up exactly where this progression leaves off.
Practise this at home
Alphabet Tracing A–Z
27-page printable pack · £4.99 · Buy once. Yours forever. No subscription, no renewals.
Get the packParents also read
Pre-Writing Skills Before Letters
Before letter tracing: the pre-writing strokes — lines, curves, zigzags and shapes — that build the hand control children need for writing.
Pencil Grip Guide for Parents: Ages 3–6
The tripod grip explained for parents: how pencil grip develops, what to model, practical exercises — and what not to correct too early.
Scissor Skills Progression (Ages 3–5)
The scissor skills progression: snipping, straight lines, zigzags, curves and shapes — with safety basics and left-handed tips for parents.
Questions parents ask
What age should my child start tracing lines?
Finger tracing can start whenever they're interested — often around 2½ to 3. Pencil tracing usually clicks between 3 and 4. But interest matters more than age: a keen 2-year-old with shaving foam is better placed than a bored 4-year-old with a worksheet.
My child scribbles over the page instead of following the line — what do I do?
Drop back to level 1: big finger tracing in sensory materials, where 'following' is the whole game and there's no pencil to fight. Scribbling usually means the fine-motor demand outran the fun — make it bigger, messier and pencil-free for a while.
Thick or thin lines to start with?
Thick, always. A wide dashed line forgives wobbles and lets the child feel successful, which is what brings them back tomorrow. Thin lines are level 3 — they're a goal, not a starting point.
How long should a tracing session last?
Five to ten minutes, ending while it's still fun. One page, or even half a page, is a complete session at this age. If they ask for more, that's wonderful — but never assign more.
Does tracing actually help with writing letters later?
Yes — it's the direct preparation. Letters are precise traced paths, and every level here (direction, corners, smooth curves, pressure) transfers straight into letter formation. Children who trace confidently typically learn letter formation faster and with far less frustration.
Anything different for left-handed children?
Very little at this stage. Left-handers may naturally want to trace right-to-left — gently encourage left-to-right with the start dots, since reading and writing demand it, but don't make it a battle. Smudging bothers some lefties with pencils; chunky crayons smudge less.