 LittleLearners
✏️ Writing & Fine Motor Skills
Pencil Grip Guide for Parents: Ages 3–6
The short answer
Pencil grip develops in stages — fist grip, then fingers, then the mature tripod grip around age 4–6. Model the tripod grip (thumb and finger holding the pencil, resting on the middle finger), offer short tools and playful hand-strength games, and avoid constant correction, which kills motivation faster than any grip helps it.
The stages of grip (and what's normal when)
Grip development follows a well-trodden path, and every stage is normal at the right age:
- Palmar/fist grip (1–2): the whole hand wraps the crayon, movement comes from the shoulder. Perfectly correct for a toddler.
- Digital pronate grip (2–3): fingers hold the crayon, palm faces down. Still shoulder-driven, and still fine.
- Static tripod (3–4): thumb, index and middle finger take over; the hand moves as a unit. This is the tripod arriving.
- Dynamic tripod (4–6): the mature grip — thumb and index finger move the pencil while it rests on the middle finger. Finger-driven, precise, and the goal.
What the tripod grip actually looks like
Hold your pencil right now and look: thumb and index finger pinch the pencil about 2–3 cm from the tip, and the barrel rests back against the middle finger. The remaining fingers tuck comfortably underneath. The wrist sits fairly straight, and the movement comes from the fingers — try writing your name moving only your fingers.
That's the whole thing. When you model it for your child, exaggerate slightly and narrate: 'pinch with these two fingers, rest it on this one.' Then hand the pencil over and let them try — once. Then move on and play.
What NOT to correct too early
This is the most important section in this guide. A three-year-old with a fist grip doesn't have a problem — they have a three-year-old's hands. Constantly repositioning their fingers teaches them that drawing is a test they're failing.
What actually moves grip forward is hand strength and maturity, not correction. A child with strong hands from playdough, climbing and peg games will slide into a tripod grip on their own schedule. A child nagged about grip will avoid drawing — and lose the very practise that builds it.
So: model the grip when you draw together, offer tools that encourage it (below), and otherwise leave it alone until around four to five. Then, gentle guidance is fair game.
Practical exercises that build grip without nagging
Every one of these develops the pinch strength and finger control behind a good grip — and none of them mentions the word 'grip':
- Broken crayons: snap crayons short. A stubby crayon can't be fisted — the hand automatically shifts toward a tripod. Teachers have used this trick forever.
- Tweezers and tongs: transferring pom-poms, pasta or beads between bowls.
- Spray bottles: water play with a trigger spray builds serious finger strength.
- Clothes pegs: pegging, unpegging, pegging in patterns.
- Vertical surfaces: easels, chalkboards, or paper taped to the wall. Writing upright puts the wrist in the ideal position automatically — it's the closest thing to a cheat code.
- Playdough warm-ups: two minutes of squeezing before writing loosens and strengthens little hands.
Tools that help (and honest notes on each)
Short pencils and crayons: the best first step. Short tools physically prevent fist grips and cost nothing.
Triangular pencils: the shape guides fingers into position. They help some children noticeably and do nothing for others — worth trying, not worth stressing over.
Pencil grips (the rubber add-ons): useful as a bridge for a child stuck in an awkward grip around age 5, especially the simple tripod-shaped ones. They're a scaffold, not a solution — pair them with the strength play above, and plan to remove them once the grip settles.
Slant boards or angled surfaces: genuinely helpful for wrist position if your child hooks their wrist uncomfortably. A ring binder turned sideways works as a free trial.
Paper position and posture
Grip gets the attention, but position does half the work. Tilt the paper slightly — top-right for right-handers, top-left for left-handers. Feet should reach the floor (or a footrest), table at elbow height, and the non-writing hand holds the paper still — 'helper hand' is a great phrase to teach.
Watch for the hunched vulture: face inches from the paper usually means the chair is too low or the child is tired, not that anything is wrong with their eyes or grip. Fix the furniture before the fingers.
For left-handed writers, everything mirrors: paper tilted top-left, and the pencil held a little further from the tip (3–4 cm) so they can see what they're writing instead of covering it with their hand. A quick check: if they're smudging everything and getting frustrated, the grip distance is usually the culprit.
When to ask for help
Most grip quirks resolve with time and strength play. Mention it to the teacher or GP — who may suggest an occupational therapist — if: the fist grip persists well past five despite encouragement; your child complains of pain or tiredness when writing; they avoid all drawing and writing entirely; or the grip is so unusual it clearly blocks them (pencil held with a full fist at six, for example).
This isn't alarming — occupational therapists see grip queries constantly, and early, light-touch advice usually sorts it. It's just worth a conversation rather than another year of hoping.
Model it, don't lecture it
Children learn grip the way they learn everything physical: by watching and copying, over hundreds of repetitions. Draw with them, write shopping lists where they can see, narrate your own fingers once in a while — and trust the process.
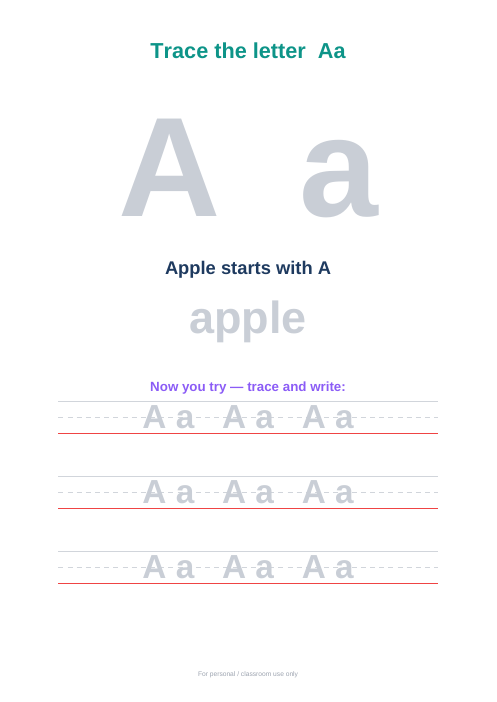
When the grip is settling and your child is ready for real letter formation practise, our alphabet tracing pack gives every letter with proper UK handwriting lines — the right moment to put that developing tripod grip to work.
Practise this at home
Alphabet Tracing A–Z
27-page printable pack · £4.99 · Buy once. Yours forever. No subscription, no renewals.
Get the packParents also read
Pre-Writing Skills Before Letters
Before letter tracing: the pre-writing strokes — lines, curves, zigzags and shapes — that build the hand control children need for writing.
Scissor Skills Progression (Ages 3–5)
The scissor skills progression: snipping, straight lines, zigzags, curves and shapes — with safety basics and left-handed tips for parents.
Line Tracing: The Full Progression
The line tracing progression, level by level: finger tracing to thin lines, mazes and shapes — when to move up, and how to know your child is ready.
Questions parents ask
What age should my child use a tripod grip?
It typically emerges around 4–5 and settles by 6, but the normal range is wide — some three-year-olds tripod naturally, some five-year-olds are still transitioning. Strength play matters more than the calendar.
Are pencil grips worth buying?
As a temporary bridge for a 5-year-old stuck in an awkward grip, yes — the simple tripod-shaped ones. As a magic fix, no. Pair them with hand-strength play and plan to phase them out once the grip is established.
My 4-year-old still holds the pencil in a fist — is that a problem?
Usually not. Offer short crayons, do the strength games, model the tripod when you draw together — and give it time. If it's unchanged at 5–6, mention it to the teacher.
Should I worry about my left-handed child's grip?
The grip itself is a mirror image and completely fine. Watch the practical bits instead: tilt the paper the other way, leave room on the left so their elbow doesn't clash with neighbours, and check whether smudging bothers them (pencils smudge less than felt tips).
Does writing on a vertical surface really help?
Yes — it's one of the best-supported tricks. An easel or paper taped to the wall naturally extends the wrist into the ideal writing position, which makes a tripod grip almost automatic. Worth trying before buying any gadgets.
How long should writing practice last at this age?
Minutes, not half-hours: 5–10 minutes at 3–4, building gradually. Two short sessions beat one long one, and stopping while it's still fun keeps them willing tomorrow.